Thursday, November 20, 2014

Old School Style Gravy

I use a roux all the time to thicken soups, stews and gravies.  If you have made chicken pot pie you probably have made a roux without knowing it.  Roux is equal parts fat and flour cooked together then added to liquid to thicken.  The longer you cook a roux the darker it gets.  Most recipes call for a blonde or a white roux like the one below.


Gravy

Roux
4   Tbsp. pan drippings and/or butter
6   Tbsp. flour brown rice flour
Liquid
2   cups  turkey or chicken stock

Procedure

1   Melt fat or over medium high heat in a sauce pan. Add flour all at once whisking vigorously. When mixture starts to bubble, reduce heat to low and reduce whisking. Cook until you smell a toasty aroma then cook 2 minutes more, stirring occasionally.

2   Add 2 cups turkey or chicken stock to the roux in the pan.  Whisk until smooth.  Bring to a boil and simmer 2 minutes.  Serve immediately.

3   To thicken a hot liquid, allow roux to cool to room temperature add to hot liquid.

4   Store roux in a jar. Refrigerate up to a month. Simply break off pieces and use as needed.

Yield: 1/3 cup roux, 2 cups gravy
You can make this gravy!  It is buttery, rich and delicious.
Take it One Prep at a Time,
Chef Jackie

Wednesday, November 19, 2014

Winner Winner Turkey Dinner!!!!

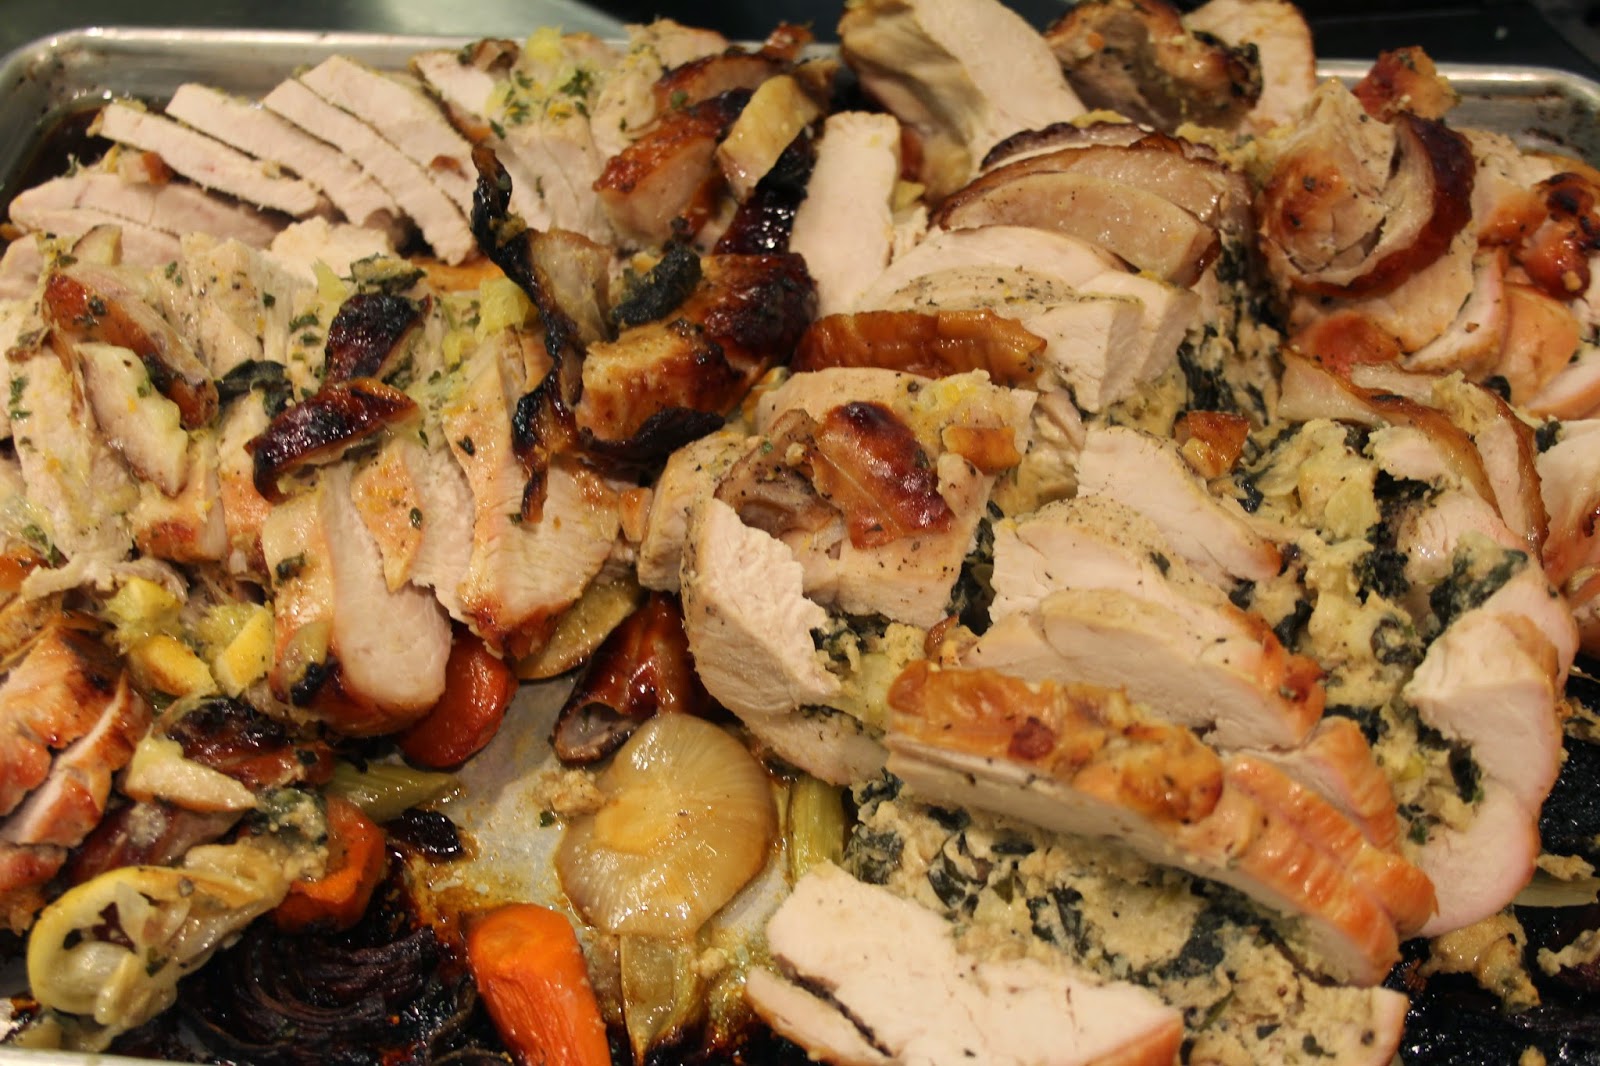
This is my all time favorite roasted turkey recipe. The turkey is first marinated overnight in a brine to add flavor and moisture.  Then it is seasoned and placed on a rack of vegetables.  Citrus butter is smeared under the skin to keep the breast moist.  As it cook it is basted with Cider Maple Glaze.  If your mouth isn't already watering imagine roasted root vegetables piled high around this gorgeous golden bird.


Northern Michigan Maple Glazed Turkey Breast

Turkey:
                        Brine; see sub recipe
1   8-10 pound   turkey breast
2                      oranges
1                      lemon
1   Tbsp.           maple syrup
1   tbsp.            Dijon mustard
                        Celtic sea salt and fresh ground pepper
4   Tbsp.           butter
Vegetable Rack:
2                      carrot peeled and large diced
2               celery stalks large diced
1               onion diced
Cider Maple Glaze:
3/4   cups  apple cider
3     tbsp.  pure maple syrup
1     tbsp.  orange juice concentrate
1/4   tsp.     dried thyme
1/4   tsp.     dried marjoram
1     tsp.     lemon zest
6     tbsp.  butter

Procedure

1   Brine turkey breast overnight or up to 24 hours.

2   Preheat oven to 375 degrees. Rinse  turkey and pat dry with a paper towel. Generously salt and pepper turkey inside and out.

3   Zest lemon and oranges and place zest in a bowl. Reserve 1 teaspoon zests for Cider Maple Glaze. Combine zest , mustard and butter. Cut oranges and lemons into edges. Insert oranges and lemon halves into cavity of the turkey.

4   Lift up the skin and smear citrus butter onto breast.
 

5   Line roasting pan with carrots, celery and onion (vegetable rack). Place turkey on top of vegetable rack and brush with cider maple glaze. Glaze 3 more times during the cooking process. Roast turkey  for 1½ to 2 hours or until an instant read thermometer reads 160 when placed in the thickest meat and juices run clear. If skin darkens to quickly; tent with foil.

6   Let turkey rest for 20 minutes before carving.

Cider Maple Glaze:

1   In a medium sauce pan combine apple cider, maple syrup, zest and orange juice concentrate. Boil until liquid is reduced by half.

2   Remove from heat, add fresh herbs and butter; whisk thoroughly.

Servings: 10
Copyright-Prep Like a Chef
Brine

1     cup      kosher salt
1/2   cup      light brown sugar
1     gallon  vegetable stock
1     Tbsp.   black peppercorns
1 1/2   tsp.       allspice berries
1 1/2   tsp.       chopped candied ginger
1        gallon  water

Procedure

1   Combine all ingredients.

2   Submerge large cuts of meat in brine overnight or up to 24 hours.  Weight down the meat if necessary to keep it submerged.
 
Copyright-Prep Like a Chef

Cider Maple Roasted Root Vegetables

Cider Maple Rub
1 ½   cups  apple cider
1/3    cup    pure maple syrup
2      tbsp.  OJ concentrate
1      tsp.     fresh or ½ tsp. dried thyme
1      tsp.     fresh or ½ tsp. dried marjoram
1 ½   tsp.     lemon zest
1 ½            sticks butter (room temp)
Glazed Root Vegetables
6           carrots (halved and bias cut)
6           parsnips (halved and bias cut)
3           turnips, chopped
1           small rutabaga, chopped
3           Sweet potatoes, chopped
1   tbsp.            fresh herbs
            Salt and pepper

Procedure

Cider Maple Rub

1   Mix apple cider, maple syrup, and oj concentrate.  Boil in saucepan over medium heat until reduced by half.

2   Remove from heat, add fresh herbs and butter whisk thoroughly and refrigerate.

Glazed Root Vegetables

1   Season vegetables with salt and pepper.

2   Coat veggies in cider glaze and roast 375 degrees on sheet tray 25- 30 minutes until tender crisp and golden in color.
Copyright-Prep Like a Chef


Take it one Prep at a Time,
Chef Jackie
 

Tuesday, November 18, 2014

Let's Talk Turkey!

Many people are afraid to make the Thanksgiving turkey.  Don't be it is really just a big chicken.  Most of us have cooked chicken many times so we have had plenty of practice.


Size
Choose a pound per person or a pound and half if you like to send everyone home with leftovers.  I love Thanksgiving leftovers.  I make one turkey and a separate turkey breast.  Although I prefer dark meat my guests seem to prefer white meat.

Fresh or Frozen
Fresh-This is the one time of year you can get fresh turkey pretty easily.  There are a few advantages to buying fresh.  The texture of the meat is better and it will be juicier.  When meat is frozen the water molecules or juices expand.  They contract when the bird is thawed. This causes a slight texture change to the meat. Another advantage is no waiting for the bird to thaw and trying to guess how many days you will need to thaw it.

Frozen-Frozen turkey is always available and does not need to be pre-ordered.  Most grocery stores offer huge discounts on frozen turkeys to draw you into their store to buy all your holiday fixins.

Refrigerator Thawing-Allow one full day for every 4 pounds of turkey.  A 16 pound turkey needs 4 days of refrigeration to thaw properly.  This is the preferred method for thawing any food.

Cold Water Thawing-This method takes 30 minutes per pound and is messy.  Place a securely wrapped turkey in sink over the drain.  Turn on COLD water and let it run over the turkey until it is thawed.  It is easy to see why the other method is better.  But as we all know sometimes we need a back up plan.

Storing and Sanitation-Any raw poultry should be on the bottom shelf of the refrigerator or freezer with a pan underneath.  This ensure that no juices will drip into other food; possibly food that won't be cooked.

Wash all tools and equipment with hot soapy water and air dry.
Wash hands, arms and finger nails with hot soapy water before preparing anything else. 
I like to wear gloves when working with raw meat.

Cooking Temperature and Resting-USE A THEMOMETOR! If you don't have one buy one.  Poultry should be cooked to 165 degrees.  Place the probe of the thermometer between the leg and the thigh or the thickest part of the meat.  If it is the proper temperature remove from the oven and let the turkey rest for 20-30 minutes before carving.  Resting allows the meat (muscle) to relax and helps keep the juices in the meat.

Remember...Take it One Prep at a Time,
Chef Jackie

Wednesday, October 22, 2014

Pumpkin Pop

Popcorn with pumpkin pie spice is super yummy and addicting!   I like mine with dehydrated apple slices. It is like a caramel apple without the mess!
Give this easy recipe a try.
 
Pumpkin Pop
8-10
cups
popped popcorn (I used Skinny Pop)
1/2
cup
butter
1/4
cup
sugar
1
tsp.
pumpkin pie spice
Optional Add-ins:


candy corn


nuts


die-hydrated apple slices
1
Divide popcorn onto 2 parchment lined cookie sheets.
2
Melt butter over low heat. Add sugar and spice. Boil for 2 minutes.
3
Pour over popcorn and stir with a wooden spoon to coat. Refrigerate 5 minutes and stir in an add-ins.
 
Take it One Prep at a Time,
Chef Jackie

Tuesday, October 21, 2014

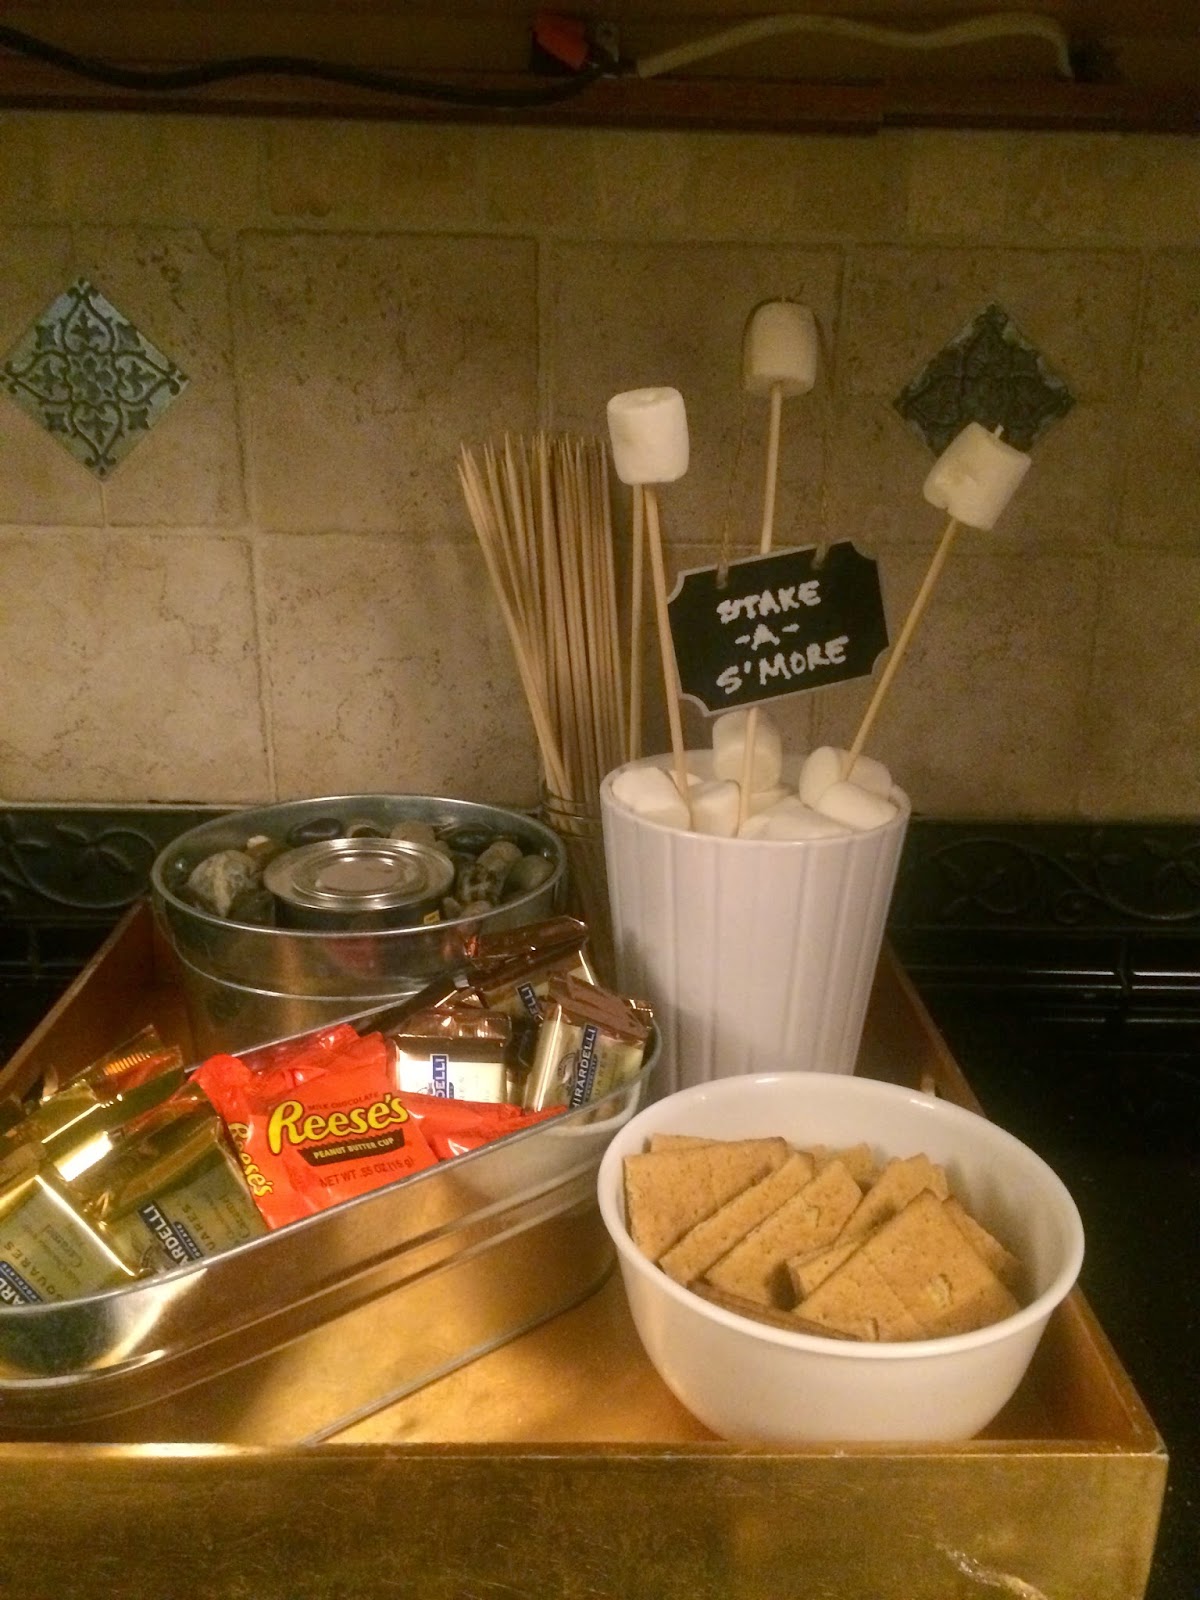
Trick or Treat S'Mores Bar

Halloween is so much fun in my neighborhood.   I usually walk down the street and pass out candy with my friend Susan. The guys and our kids hit the streets to get the loot.  Although our kids like trick or treating they really do not eat very much candy.  This of course I do not understand because as a kid that was the all I wanted to do was dress up and run around getting candy.  I would keep some, trade some and give some away.  Well with so much left over candy I have had to come up with places to donate it and different ways to use it.  We have made center pieces and graham cracker houses.
Today I want to share with you how to make a ...

Indoor/Outdoor S'more Bar
1 heat proof container (found mine in the paint section of the hardware store)
garbage bags (this makes the container lighter and easier to move)
foil
rocks or gravel
1 or more gel chaffer fuels (used for catering and sold at large grocery stores)
lighter
assorted leftover candy
marshmallows
graham crackers
bamboo skewers
Place bags in the bottom of the container.  I used a galvanized bucket.  I like the look.  Plus it has a handle so it is portable.  Top with foil followed by the rocks.  Nestle chaffer fuel in the center.  It is that easy.  You can make this is big as you want.  Works great as a table-top center piece or as a dessert station at a graduation.  The ideas and styles are endless.


Take it One Prep at a Time,
Chef Jackie

Monday, October 20, 2014

Halloween Cookie Cutouts

I just love Halloween!  I love the fall air and the changing of the leaves.  What I love most is all the cool foods you can make.  There are truly no rules and the ideas are endless. 

This year I took a stab at making rolled fondant cookies.  Even though I am a pastry chef and baker rolled fondant has always scared me.  Plus it wasn't that convenient to find all the ingredients in my town.  What's a girl to do? Hit the web-find a recipe with ingredients I have on hand and start baking fearlessly.

I love the results and it was easy.  I adapted the recipe slightly to suit my taste. Carson my son loves these cookies so much and so do I.


Shortbread Cookie Cutouts
2
cups
butter, softened
1
cup
white sugar
2
tsp.
vanilla extract
1
tsp.
lemon extract (optional)
4
cups
all-purpose flour
pinch of salt
 
Preheat oven to 350 degrees F. Line cookie sheets with parchment.
 
  
Cream butter and sugar until fluffy. Stir in vanilla and lemon; add flour and mix well. Divide dough into 4 and flatten into disc. Wrap in plastic wrap and refrigerate 20 minutes before rolling.
 
 
Place dough on a surface dusted with flour. Dust the top of the dough with flour and roll to 1/4 inch thick using a rolling pin. Cut shapes with desired cookie cutter. Place on prepared cookie sheets.
 
 
Bake for 10 - 12 minutes, edges will be brown. Shortbread is dry biscuit style cookie.
 
 
If using fondant cut outs place fondant on warm cookies or cool and brush with corn syrup then place fondant on top.  Otherwise cool cookies and ice with your favorite frosting.


Fondant
1
stick Regular Crisco or 1 cup
1
cup
Corn Syrup
1
tsp.
Almond
½
tsp.
Salt
1
2-lb
bag powder sugar
 
In Kitchen Aid mixer with bread kneader attachment – knead until all ingredients until mixed (this will look terrible).
 
 
Pour on to counter and knead for 5-10 minutes until fondant comes together and is workable.
 
 
Add paste food coloring (from a craft store – cake decorating section) – Knead in food coloring with your hands, be sure to use plastic gloves.
 
 
Roll out the fondant between 2 pieces of parchment or on a silicone baking mat.  Roll to 1/8 inch.
 
Use the same cookie cutter to cut out the fondant shape. Remove excess fondant but leave the shapes alone on the parchment paper so you do not stretch or distort them.
 
 
Put the fondant shapes that are on the parchment paper onto a tray. Put the tray into the freezer.
 
 
As soon as the cookies come out of the oven, take the fondant out of the freezer and put on the cookie. If more than one layer of fondant (like a wing) add all layers as soon as it comes out of the oven.
 
 
Let cookies dry overnight on the counter.  The next day, take a dry paper towel and blot off excess oil from the decorated cookie.
 
 
Cooled Cookie Method: Make and bake cookies as directed.  Cool completely.  Roll the fondant shapes adding powdered sugar as need to make the fondant workable.  If the fondant gets to dry rub shortening on your hands and knead the dough some more.  Brush cookies with corn syrup and top with fondant cut out.  Add other decorations now.
 
Cookie baked and cooled.  Brushed with corn syrup before adding fondant.
 Fondant rolled out. The eyes are mini chocolate chips.
 
Fondant applied.
Cats are covered in chocolate ganache.  Taste better than black food coloring.
 
Eyes are added when ganache is still wet.